Summary
- Overview
- Manage Products
- Add Payment Button
- Connect To Stripe
- Success Message
- Stripe On Published Website
Overview
You can accept payments via Stripe on your websites created with Nicepage. You should connect your Nicepage website to Stripe to get payments.
Manage Products
You can edit the Products in the Products panel.
- Click the Products icon in the Quick Access Pane.
- Add, edit, and delete Prodicts.
Add Payment Button
The simplest way to start with Stripe Payments is to add the Payment Button. You can add the Payment Button Element from the Add Panel.
Select Any Product in the Property Panel.
Connect To Stripe
Select the Button, and click the Stripe link In the Property Panel. Click Connect.
Authorize Stripe Account
You get to the Stripe Authorization page. On the opened page, enter the email to create an account or use your existing Stripe account. Complete the steps.
NOTE: You may skip the next step to enter the phone for faster proceeding.
Success Message
If your connection is successful, you will get the success message.
You will see the Checkmark on the Button In the Property Panel for the selected Payment Button.
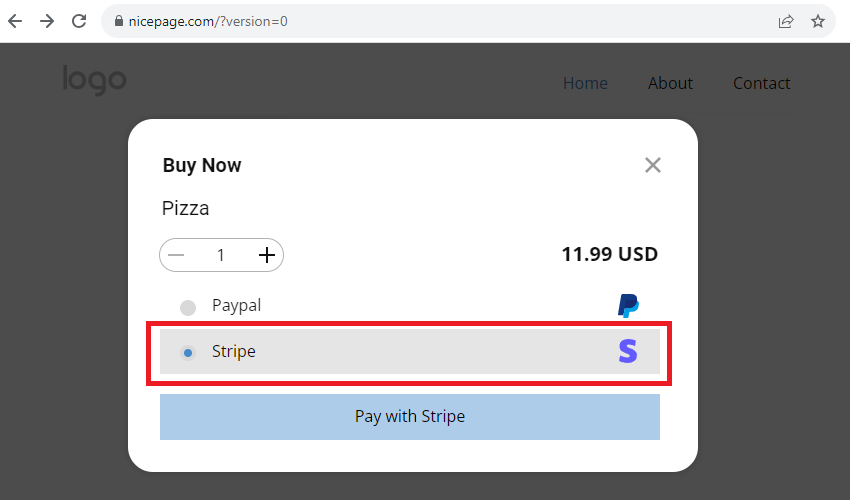
Stripe On Published Website
After you publish a website, you can select or click the Stipe option in the Payment Popup to proceed with the Stripe Payment.
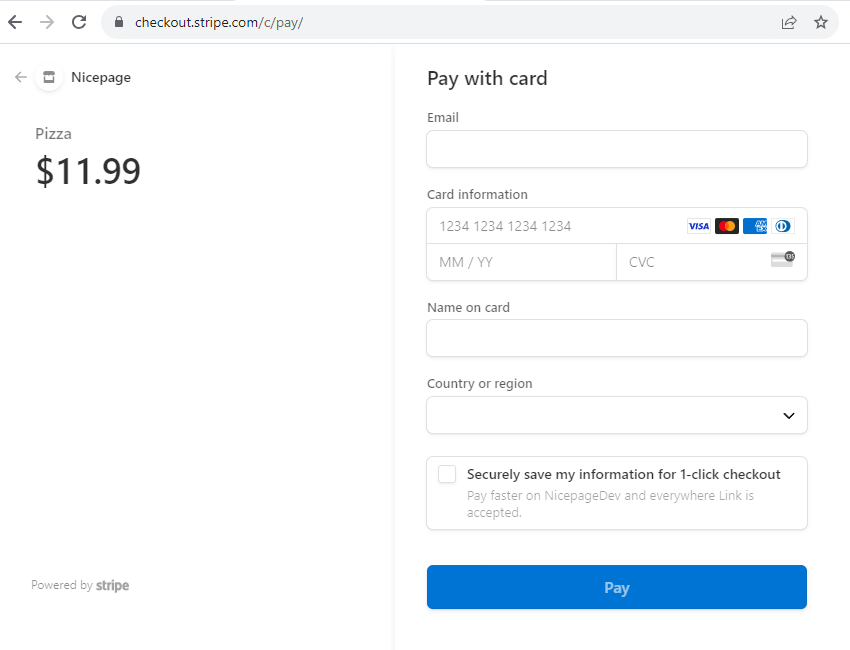
Click the Pay with Stipe button on the Form to open the Stripe Checkout page where your buyers can enter their card data.
Read Also
## Summary
- Overview
- Manage Products
- Add Payment Button
- Connect To Stripe
- Success Message
- Stripe On Published Website
## Overview
You can accept payments via Stripe on your websites created with Nicepage. You should connect your Nicepage website to Stripe to get payments.
!stipe-payments.jpg!
## Manage Products
You can edit the Products in the Products panel.
- Click the **Products** icon in the Quick Access Pane.
- Add, edit, and delete Prodicts.
###
!edit-products.png!
## Add Payment Button
The simplest way to start with Stripe Payments is to add the Payment Button. You can add the Payment Button Element from the Add Panel.
!add-payment-button.png!
Select Any Product in the Property Panel.
!select-product.png!
## Connect To Stripe
Select the Button, and click the Stripe link In the Property Panel. Click **Connect**.
!stripe-connect.png!
## Authorize Stripe Account
You get to the Stripe Authorization page. On the opened page, enter the email to create an account or use your existing Stripe account. Complete the steps.
!stripe-create-account.png!
**NOTE:** You may skip the next step to enter the phone for faster proceeding.
## Success Message
If your connection is successful, you will get the success message.
!stripe-connection-success.png!
You will see the Checkmark on the Button In the Property Panel for the selected Payment Button.
!stripe-connected.png!
## Stripe On Published Website
After you publish a website, you can select or click the Stipe option in the Payment Popup to proceed with the Stripe Payment.
!stripe-dialog-live-site.png!
Click the Pay with Stipe button on the Form to open the Stripe Checkout page where your buyers can enter their card data.
!stripe-dialog-live-form.png!
## Read Also
- [Payment Button Element](page:425789)
- [Payment Popup](page:425797)
##